How to use Demo Track Maker
Demo Track Maker turns a chord chart into a small band — bass, piano and drums — and lets you record your voice or instrument on top. This guide walks through every part of the screen.
Start in three steps
- Type the chords. One box is one beat. Write
Cin the first box of a bar,Amin the next bar, and so on. - Press ▶. Bass, piano and drums play the chords. Change the tempo in BPM.
- Record. Press R on a track, then ●. Use headphones so the backing does not leak into the microphone.
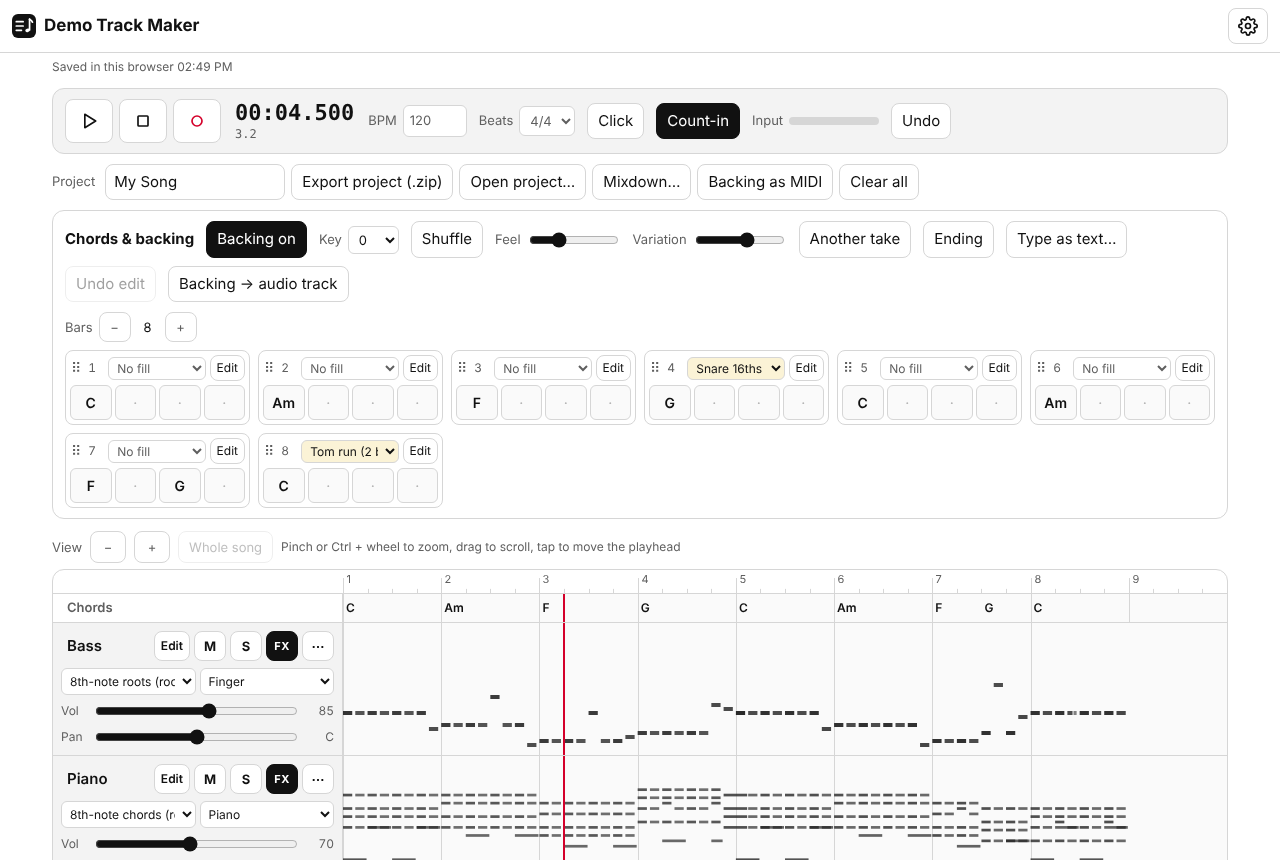
Typing the chords
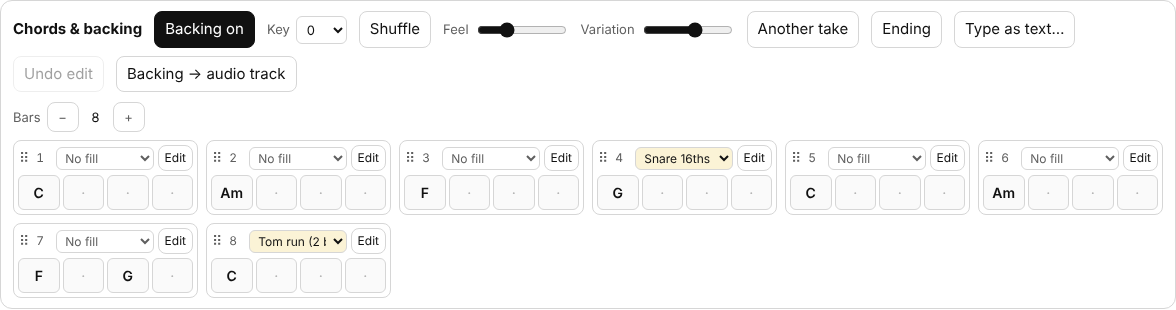
- One box per beat. An empty box keeps the previous chord, so a bar with only
Cin the first box plays C for the whole bar. Two chords in a bar: write the second one where it starts (for exampleFon beat 1 andGon beat 3). - Chord names. Major, minor, 7th, maj7, m7, m7b5, dim, aug, sus2/sus4, 6, add9, 9 and tensions such as
7(b9), and slash chords such asC/E. A box turns red if the name is not understood. See how to read and write chord symbols. - Bars. Add or remove bars with − / + (up to 64). Drag a bar to move it (on a touch screen, long-press it first). Its chords, fill and note edits move with it.
- Type as text… Write a whole chart at once, such as
| C | Am | F G | C |. - Time signature. 4/4 or 3/4, next to BPM.
The backing parts
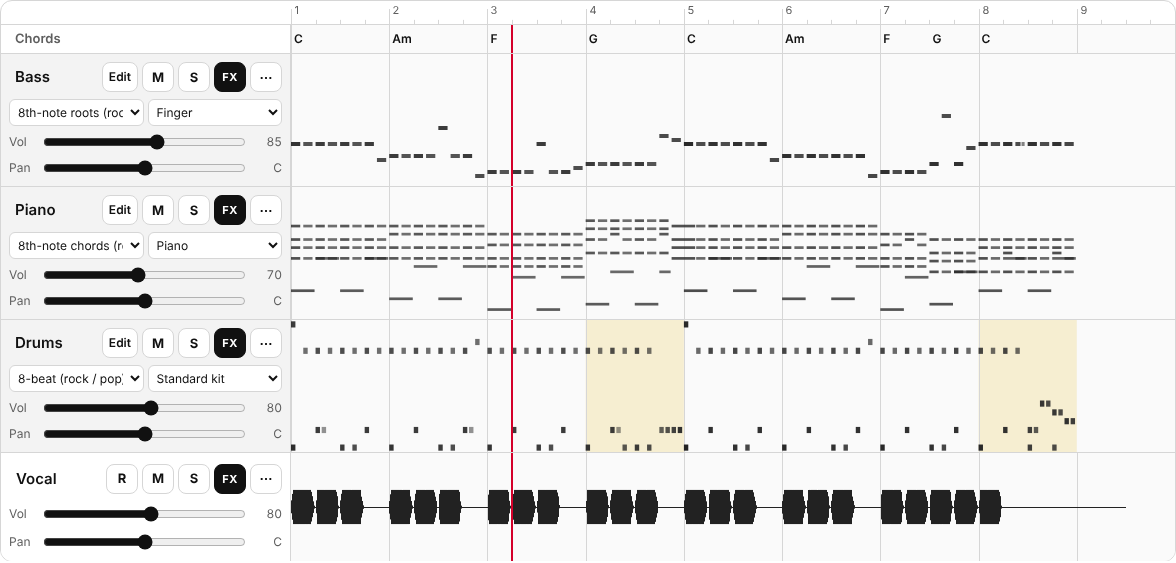
- Pattern – how the part plays. Bass: 8th-note roots (rock), Syncopated pop, Root and fifth (halves), Whole notes (ballad), Octaves (dance), Soul / Motown, Walking (jazz). Piano: 8th-note chords (rock / pop), 8th-note arpeggio (pop), Quarter-note chords, Pop with anticipation, Broken chords (ballad), Half-note chords, Whole notes (pad), Stride (bass + chord), Jazz comping (Charleston). Drums: 8-beat (rock / pop), 16-beat (pop / funk), Ride 8ths (chorus), Ballad (cross-stick), Half-time, Four on the floor, Shuffle, Jazz swing (ride), 8-beat + tambourine (pop), Shaker 16ths (acoustic pop), Four on the floor + clap, Hip-hop / R&B (808), Cowbell groove (latin / funk), Waltz. See choosing backing patterns by genre.
- Sound – Bass: Finger, Pick, Slap, Muted (Motown), Upright, Synth bass, Analog synth, 808 bass. Piano: Piano, Electric piano, Organ, Strings / pad, Clavinet. Drum kits: Standard kit, Rock kit, Brushes, 808, 909 / dance, Lo-fi. All sounds are synthesized in the browser.
- Fills – choose a fill for any bar in the chord chart: Snare 16ths (1 beat), Tom run (2 beats), Tom run (1 bar), Triplet fill (2 beats), Build-up (1 bar), Hits (1, 2&, 4), Break (stop 2 beats). After a fill the drummer hits a crash cymbal (switch it off in the drum menu ⋯).
- Variation – makes the band play like people do: the bass runs into the next chord, the piano anticipates chord changes and adds colour notes, the drums add crashes, open hi-hats and short lead-ins at the end of 4- and 8-bar phrases. Another take picks a different set. 0 plays the plain pattern.
- Shuffle (on / off) delays the off-beat 8th notes into a triplet shuffle feel (blues, jazz); when it is off they are played straight. Feel adds small differences in timing and strength. Ending plays the last bar up to its last chord, then the whole band hits that chord and lets it ring to the end.
- Key moves the whole backing up or down by up to 6 half steps, for example to fit a singer's range. The chords you typed stay as they are and the chord that actually sounds is shown under each box. Recorded audio is not changed, so set the key before you record.
- Backing on / off – when it is off, the three parts are greyed out and silent.
Editing single notes
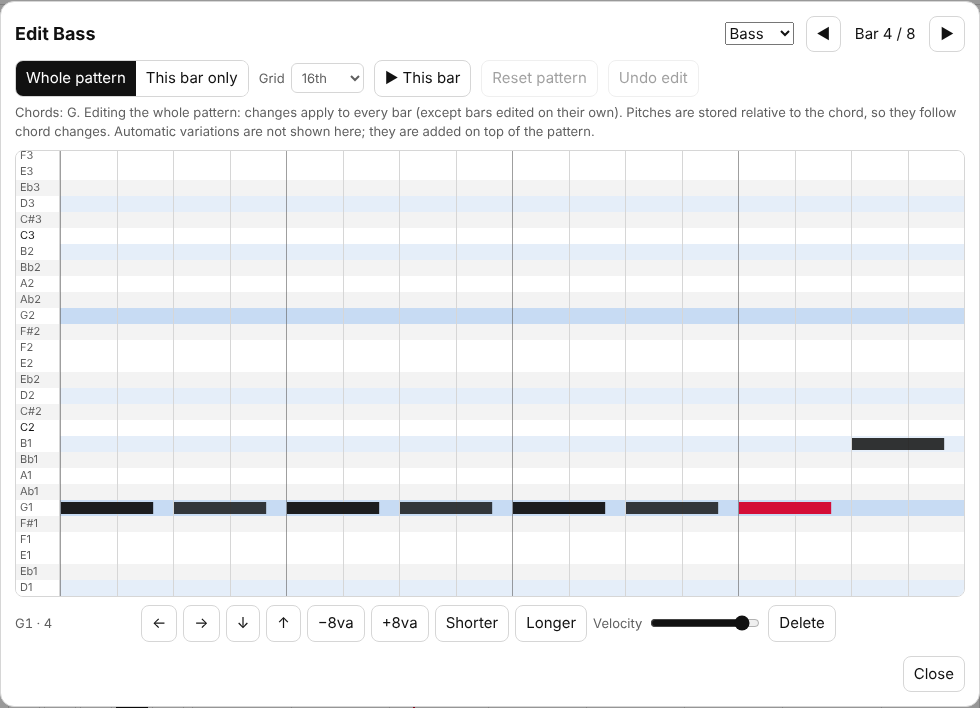
Press Edit on a part (or double-tap its row, or Edit on a bar of the chart). Tap an empty cell to add a note, tap a note to select it, then move it, change its pitch, length or velocity, or delete it. On the drums, tapping a selected hit cycles accent → ghost → off.
- Whole pattern changes every bar. Pitches are stored relative to the chord (“the 3rd”), so they follow the chords.
- This bar only changes one bar and keeps the exact notes, including the automatic variation you hear. Edited bars get a red mark on the timeline.
- Undo edit takes back the last changes; Reset pattern / Back to automatic start over.
Recording
- Press R on an audio track. The browser asks for the microphone the first time. The Input meter shows the level.
- Press ●. With Count-in on, one bar of clicks plays first. Click plays a metronome during recording and playback.
- Press ■ to stop (■ always goes back to the start). Playback also stops and goes back to the start when it reaches the end of the song (the backing or the last track, whichever is longer). Recording again on the same track replaces only the recorded range. Undo brings back the previous take.
Use headphones. With speakers, the backing goes into the microphone. If takes sound late or early compared with the backing, adjust ⚙ → Recording latency. Up to 8 audio tracks. More tips: recording vocals and guitar at home.
Importing audio and lining it up
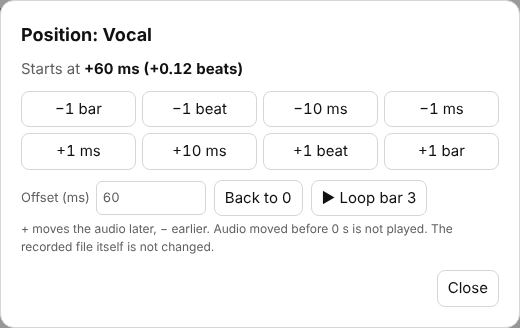
⋯ → Import audio file… puts an audio file (WAV, MP3, M4A and others your browser can play) on a track. To move a take, long-press its waveform and drag (on a computer, Alt + drag works right away; hold Shift to snap to 16th notes). For small steps, use ⋯ → Adjust position…:
Effects
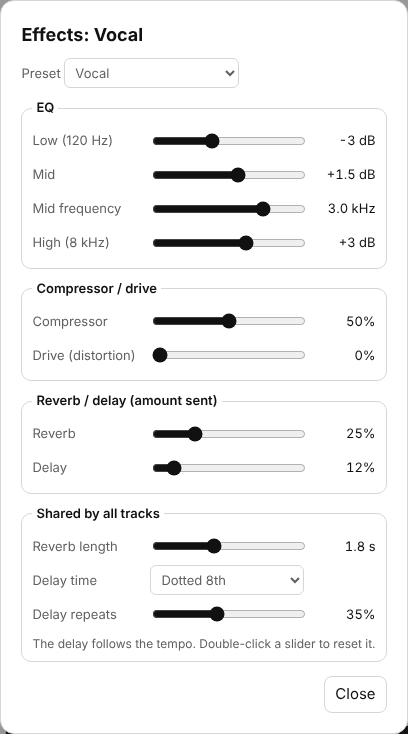
FX on every track and part opens its effects: EQ, compressor, drive, and how much goes to the shared reverb and the tempo-synced delay. Presets: None (flat), Vocal, Acoustic guitar, Electric guitar (crunch), Lead (drive + delay), Bass (tight), Drums (punchy), Distant / ambient. Double-click a slider to reset it. The master has a limiter, so the mix does not clip.
Moving around the timeline
Tap the timeline to move the playhead. Pinch (or Ctrl + wheel, or − / +) to zoom, drag or scroll sideways to move along. During playback the view follows the playhead. Whole song shows everything again.
Saving and exporting
- Your work is saved in the browser automatically and comes back when you reopen the page. Clear all starts over.
- Export project (.zip) – the settings (
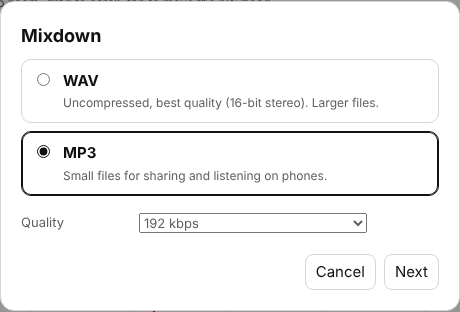
project.json) and one WAV per track. Open project… loads it again, on any device. - Mixdown… – the whole song as WAV (16-bit stereo) or MP3 (128 / 192 / 320 kbps).
- Backing as MIDI – bass, piano and drums as a MIDI file with tempo, time signature and chord names, to finish the arrangement in a DAW.
- Backing → audio track – renders the backing (or ⋯ on one part) into an audio track.
When exporting you choose the file name; it starts as the project name.
On a phone or tablet
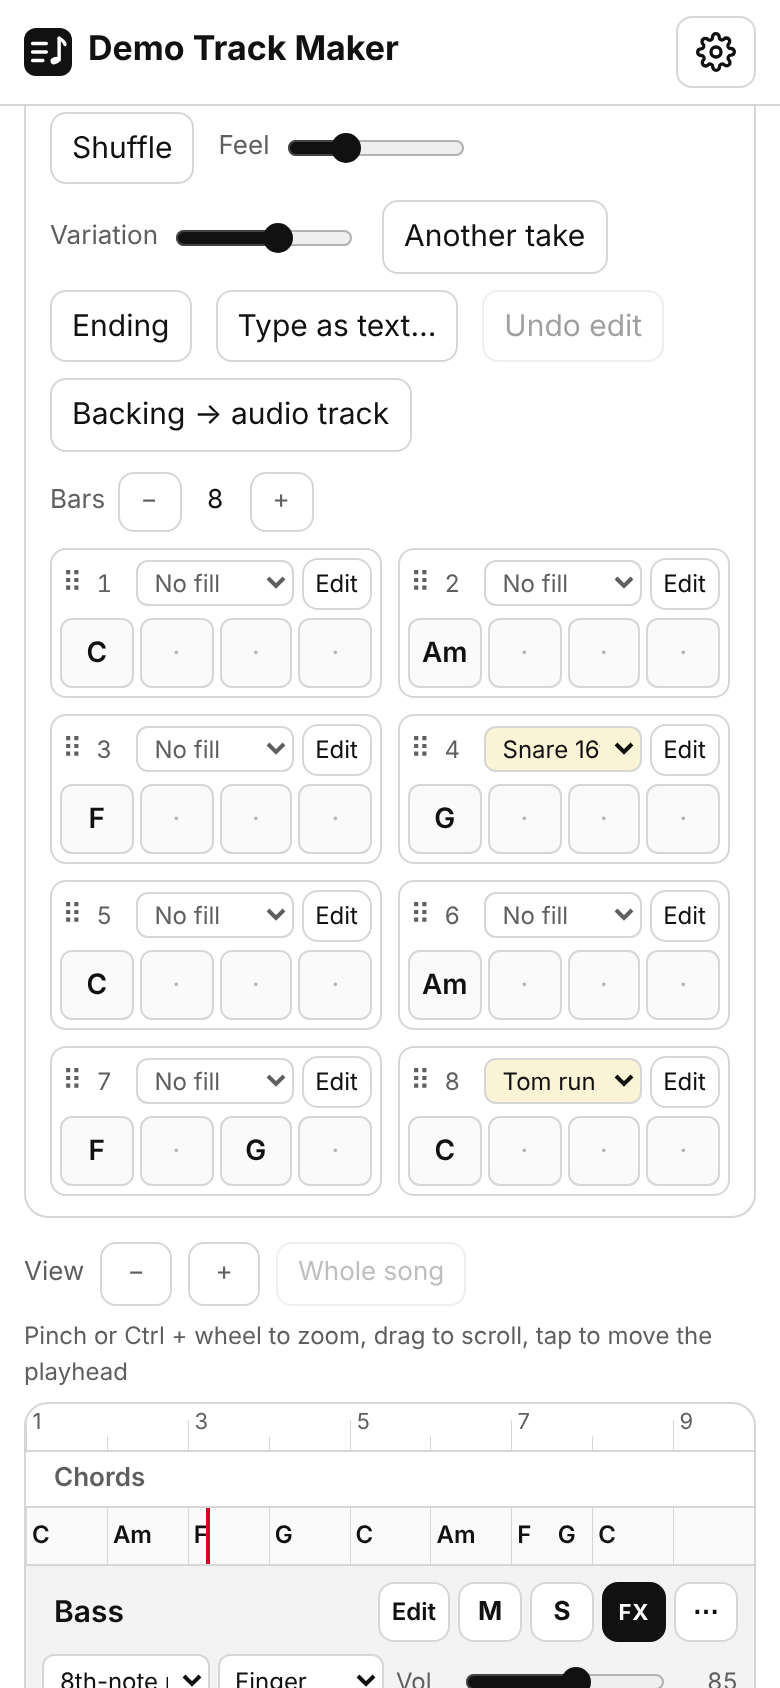
Everything works on a phone too. Use wired headphones when recording (Bluetooth headphones add a delay that is hard to correct). Keep the screen on while recording.